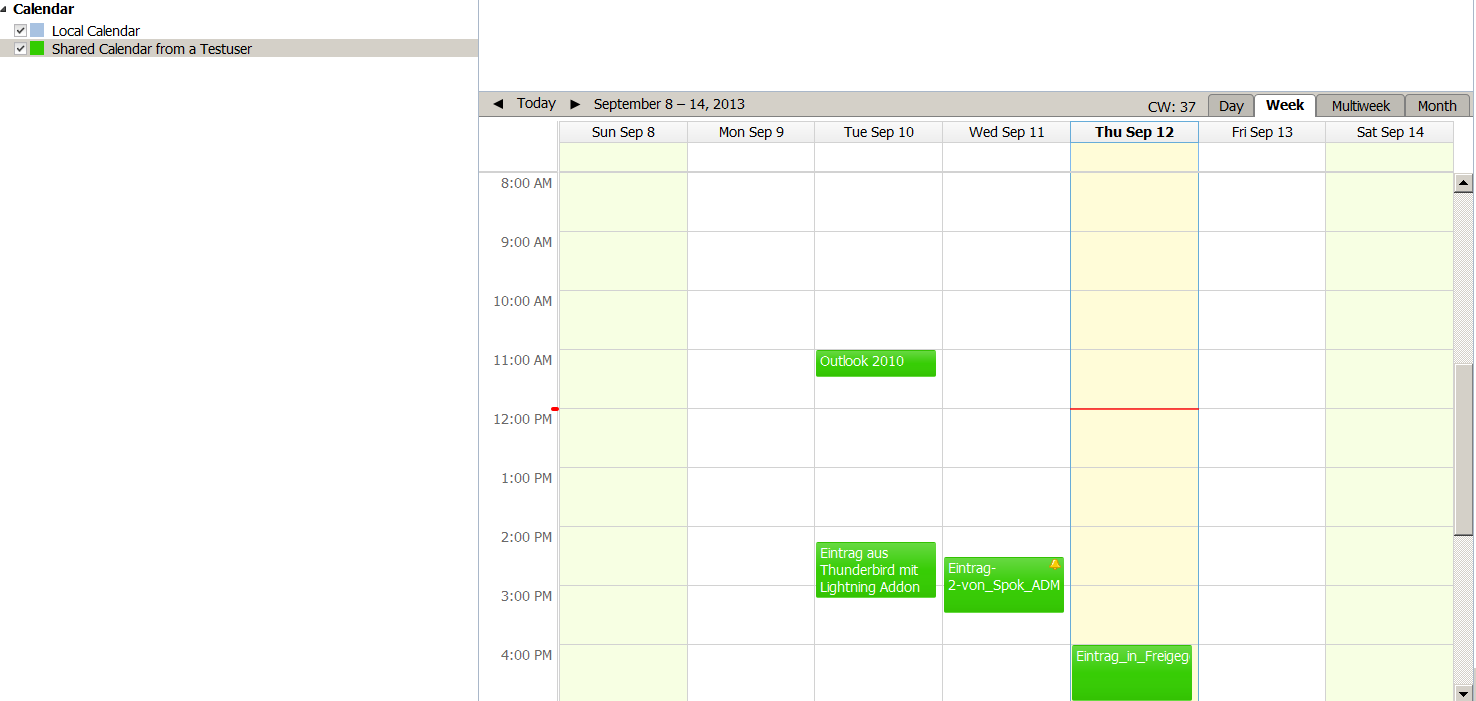
This article will cover instructions on how to configure Mozilla Thunderbird with the Lightning calendar add-on for Kerio Connect. It will detail how to subscribe to public folders and set up an shared calendar in Mozilla Thunderbird.
Requirements:
- Active KerioConenct FHI Account
- Mozilla Thunderbird ESR 17.x (installed on all PP&B Sytems)
- Mozilla Thunderbird Lightning Add-on Use the Tools->Add-ons function in Thunderbird to install the Add-on
Inhalt (hide)
1. Step 1: Subscription with Kerio WebMail 8.x
1. Login to WebMail (8.x)
2. Switch to the calendar view

3. Go to "PEOPLE" and Click on the "+" to add a shared calendar for another person
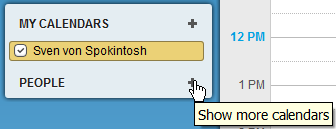
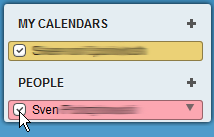
4. Now Click on the person "+" to Activate the subsection of the shared calendar

5. Mark the checkbox to activate the shared calendar.
2. Step 2: Calendar URL for Lightning:
For the successful subscription of a shared calendar in Lightning, you will need the correct calendar url, please follow this steps:
1. Login to WebMail (If you are on Kerio Connect 8.x, please switch to 'Old WebMail')

2. Right-click on a the shared calendar and choose "Use in calendar client"
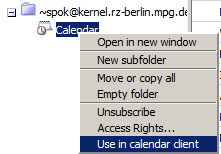
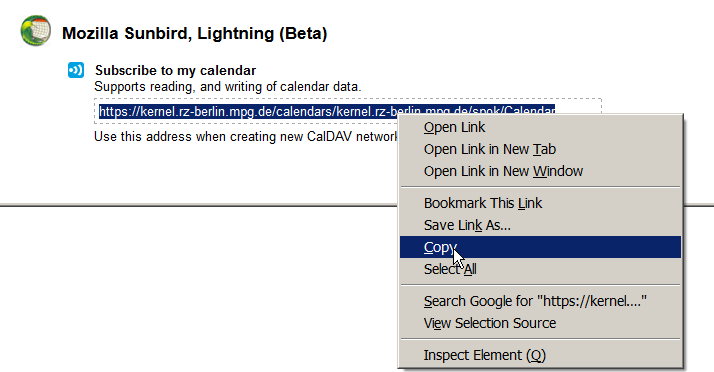
3. Copy the shown URL in the "Mozilla Sunbird, Lightning" selection to a clipboard or textile (you will need this url in the next step )
4. Log-out from the Web-interface
3. Step 3: Add the shared calendar in "Lightning"
1. Start Thunderbird and switch to your calendar tab

Note: You can install the Lightning Addon by yourself ( Tools -> Add-ons -> Lightning)
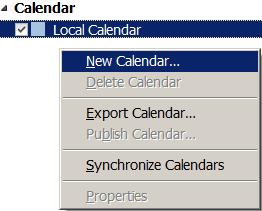
2. Right Click under the "Calendar" bar and choose "New Calendar"
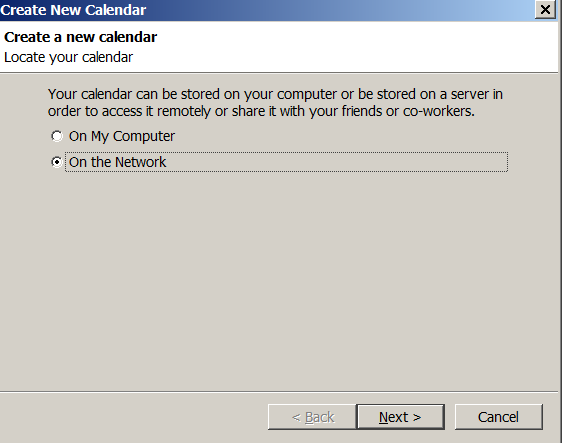
3. Choose "On the Network" and Next
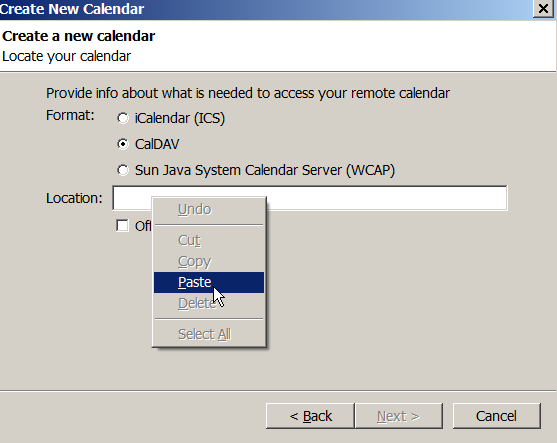
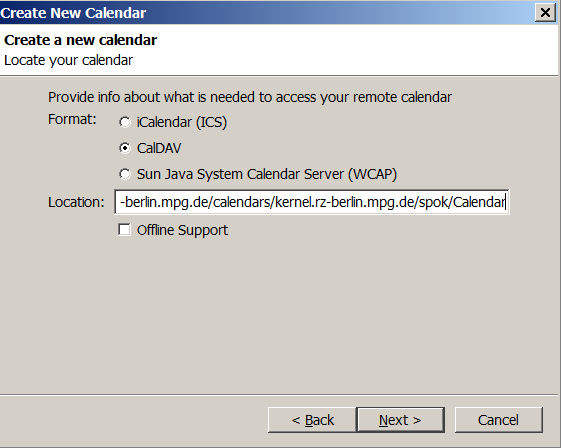
4. Switch the Format to "CalDAV" and paste the correct Calendar URL (from Step 2) in the text box and click on next
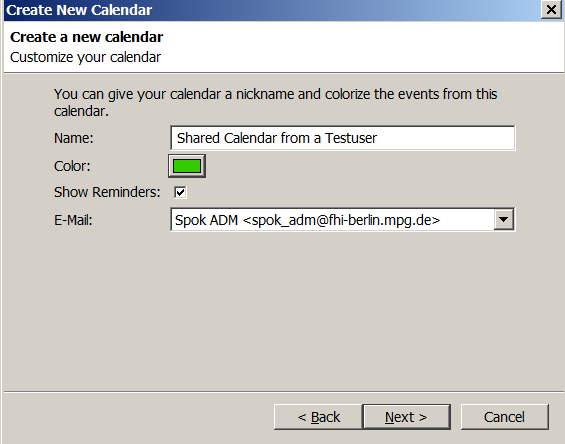
5. Choose a name & preferred color for the shared calendar and click on "Next"
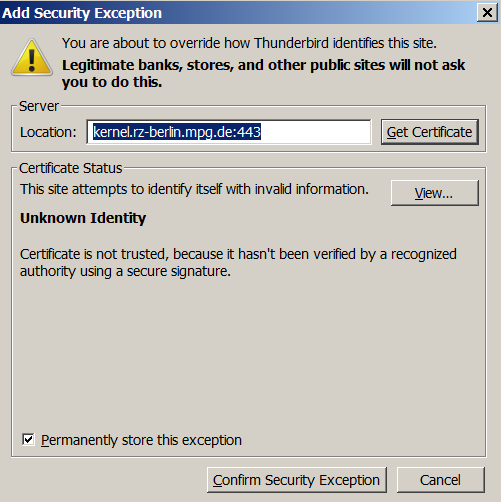
6. If a "Add Security Exception" appears , please click on "Confirm Security Exception"
7. Insert in the "Authentication box" your FHI Username and Password

8. Click on "Finish"
9. The shared calendar should now be shown
