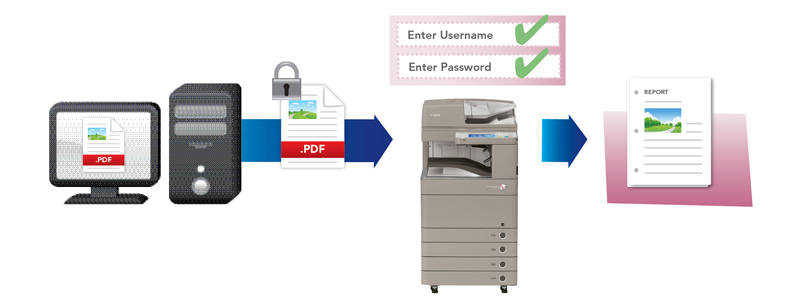
What is secured print ?
Secured print saves (temporary for 30min) your print job on the Canon Printer under an assigned PIN (password) and outputs it later only when the correct PIN (password) is entered at the Canon Printer. This function is useful when printing a confidential document.
You can use the Secured-print function on:
- PP&B Windows 7 Workstations (no additional driver installation required )
- Self-administrated windows 7 workstations (department networks,141.14.128/20 & Wifi network EDUROAM )
- MacOS 10.6.x to 10.11.x (department networks,141.14.128/20 & Wifi network EDUROAM )
If you're on an windows system, the correct drivers will be installed automatically when you're using the pp&b printserver ADRINT.! All other systems must install an additional printer driver from here:
http://ppbwiki.rz-berlin.mpg.de/Main/CanonImageRunnner#toc6
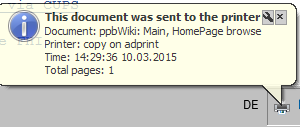
- Important: Uncollected "SECURED PRINT" jobs will be deleted automatic after 30mins ! (So don't forget your documents )
Index (hide)
1. How to use "Secured Printing" for a print job
1.1 Windows 7 guide:
- For this example we will use the correct installed printer copy (a canon image Runner advance c2540i) (please check the printer installation guide if problems occur )
http://ppbwiki.rz-berlin.mpg.de/Main/ADDaADPrinter
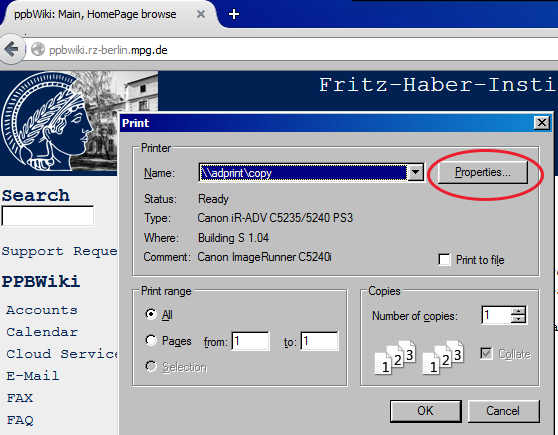
1. In your preferred application (word,thunderbird,firefox,... ) click file -> Print
2. Select “Properties” from the “Print” screen.
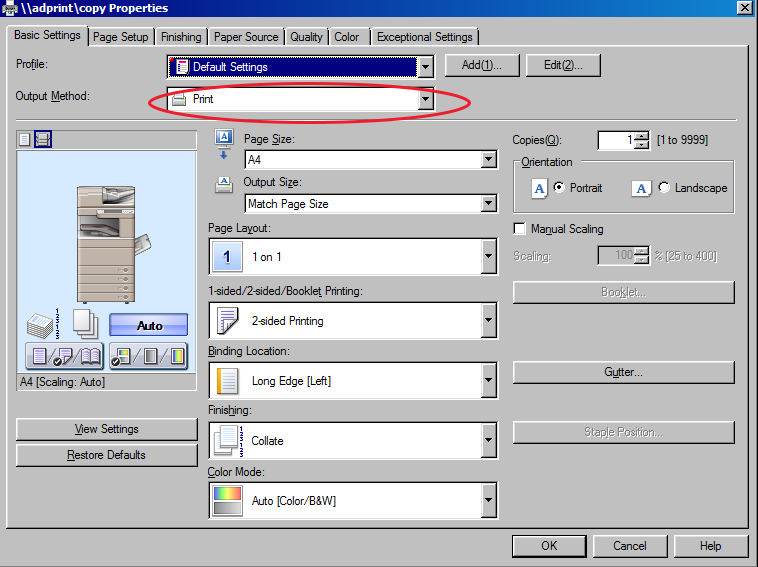
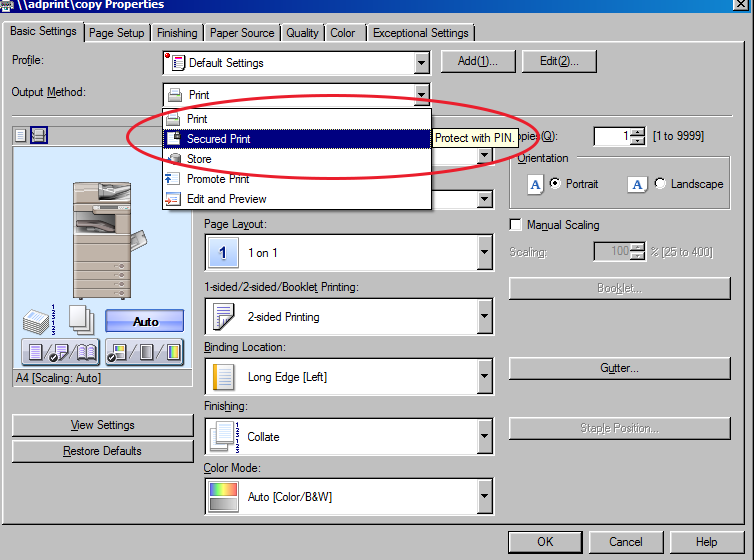
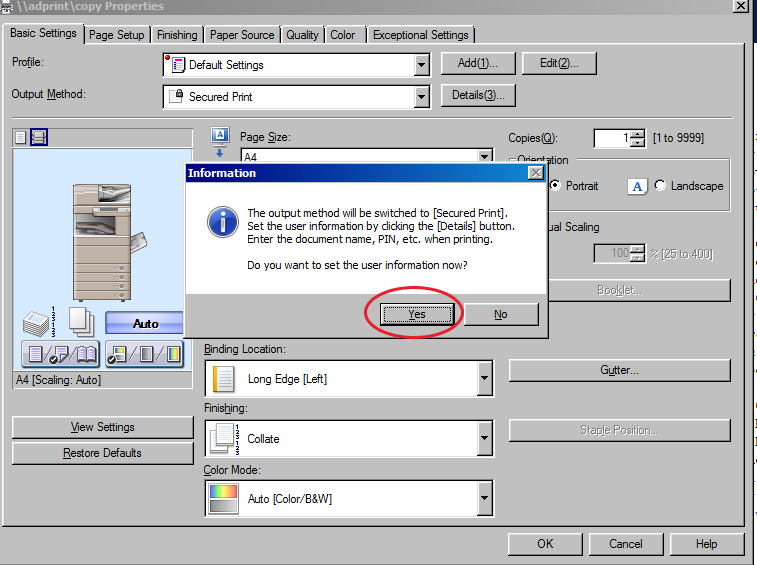
3. Change the "Output Method" from "Print" to "Secured Print"
4. Set the "User information now" by clicking in "YES"
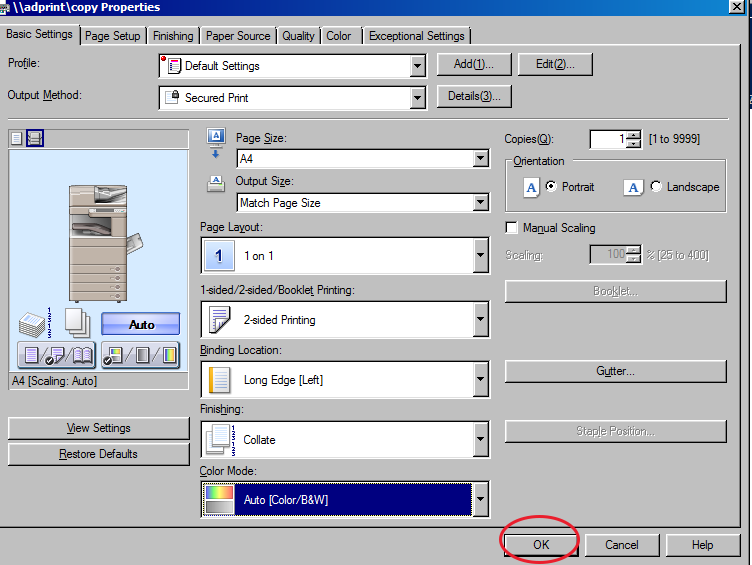
5. Specify the user name and PIN (password) for the current print job in the “Secured Print Details” screen. Click “OK” in the “Secured Print Details” screen to save your changes.

6. Click “OK” to close the “Page Setup” screen.
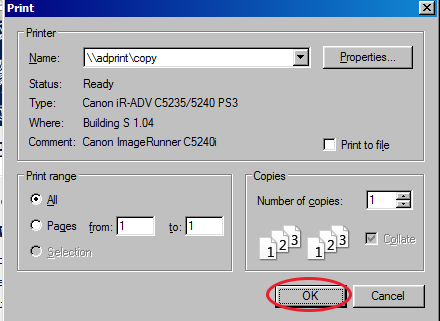
7. Click “OK” in the “Print” screen. to print your document
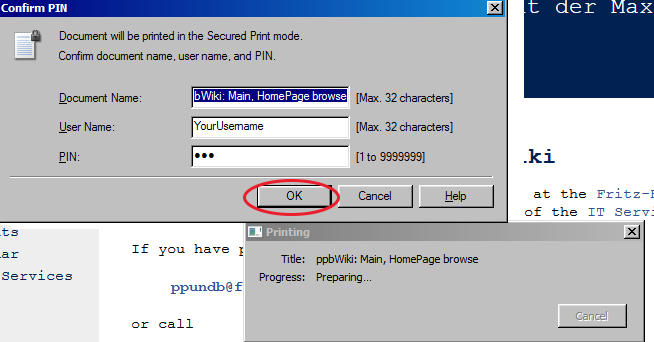
8. Confirm Document Name, User Name, and PIN (password) in the “Confirm PIN” screen and click OK. (last time to change the pin for that document)
9. The print job is sent and saved in the Canon MFP printer.
1.2 Guide for MacOS 10.6.x to 10.11.x and above
This works only when you're using the print server "adprint" with the correct ps printer driver !
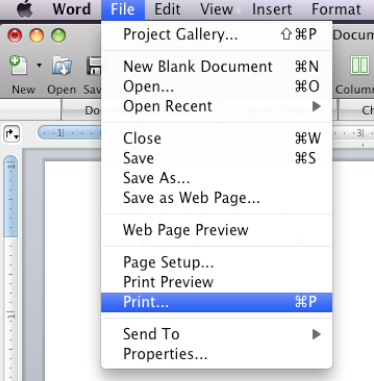
1. In your preferred application (mail,word,safari,... ) click file -> Print
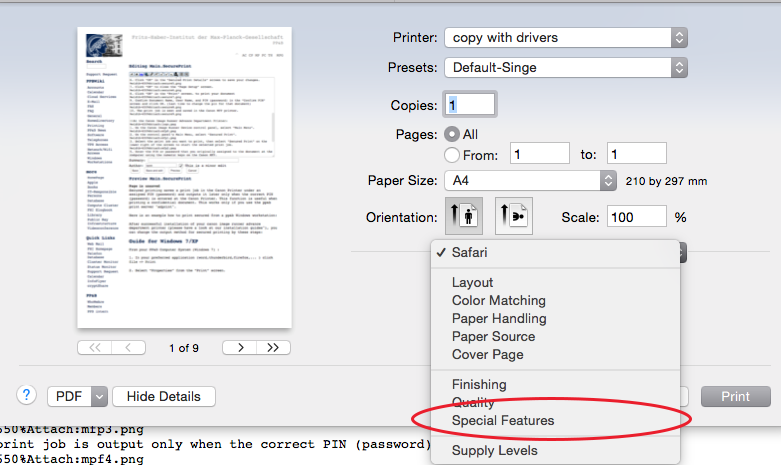
2. Next click on the 3rd pull-down and select “Special Features.
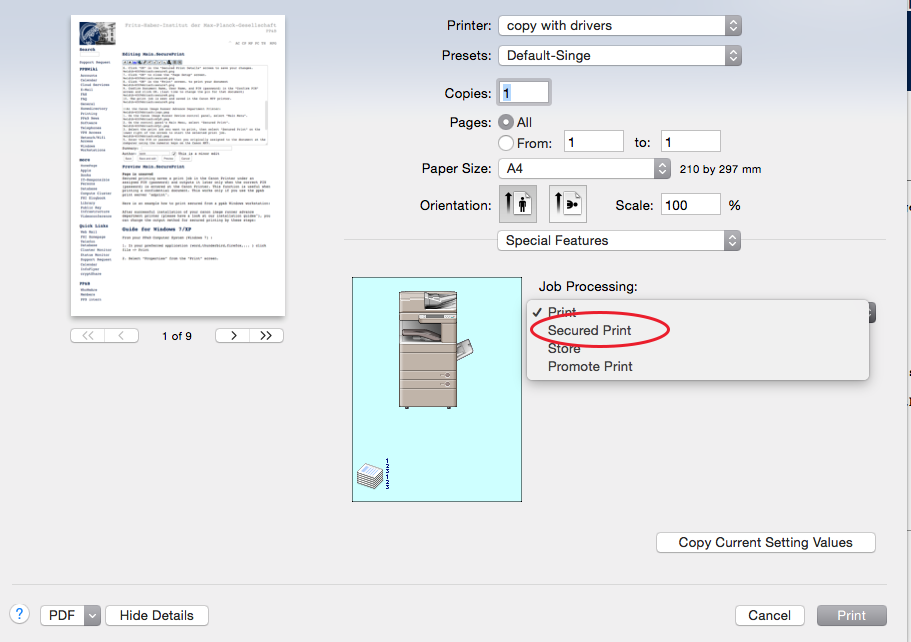
3. Next change the Output method from Print to Secured Print. Then click Print.
4. On the next dialog, make up a document name. On the username field, delete whatever is in there and type in your computer username all lowercase.In the password field create a numeric password. (Don’t forget it. You will need it later
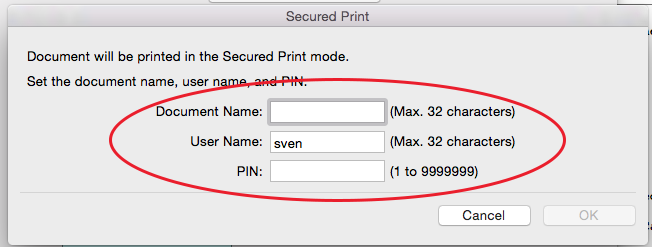
5.Click OK when finished.
2. How to get your documents/print job from the printer
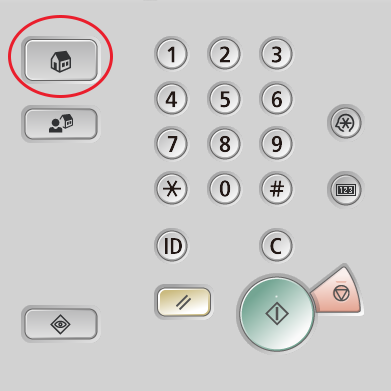
1. On the Canon Image Runner Device control panel, select “Main Menu”.
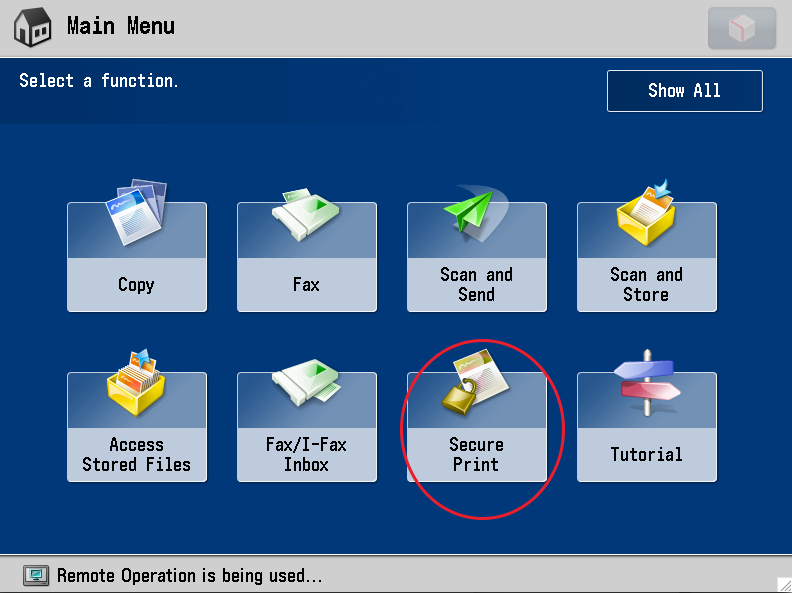
2. On the control panel’s Main Menu, select “Secured Print”.
3. Select the print job you want to print, then select “Secured Print” on the lower right of the screen to start the selected print job.
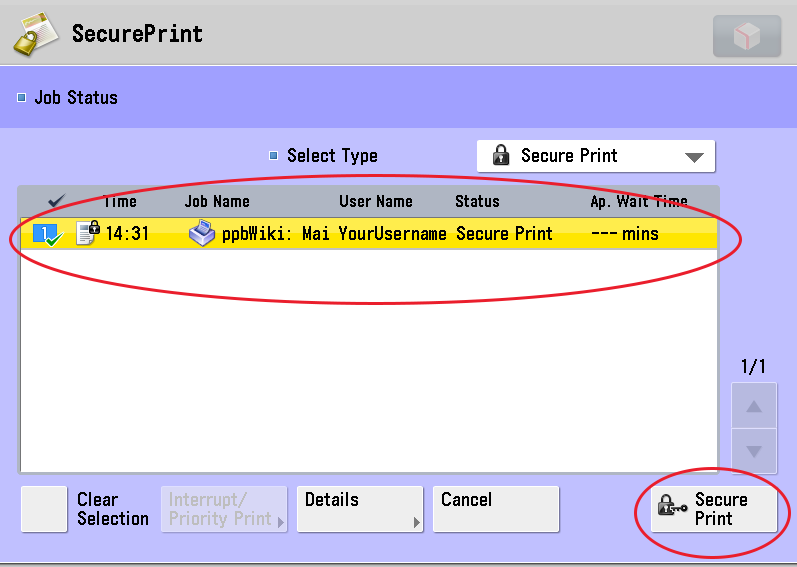
5. Enter the PIN or password that you originally assigned to the document at the computer using the numeric keys on the Canon MFP.
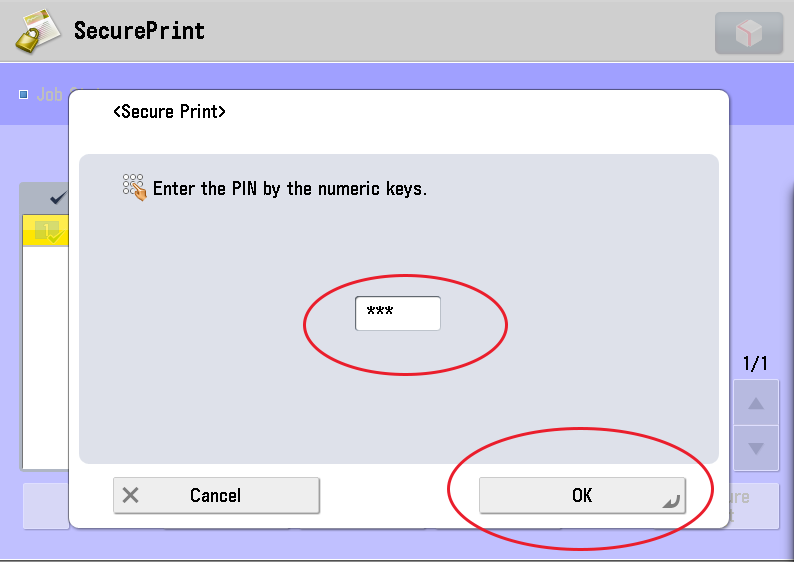
7. The print job is output only when the correct PIN (password) is entered.
3. Department canon printer list:
- accopy.rz-berlin.mpg.de (AC)
- bib-copy.rz-berlin.mpg.de (AC)
- cpcopy.rz-berlin.mpg.de (CP)
- copy.rz-berlin.mpg.de (PP&B)
- fwt.rz-berlin.mpg.de (FWT)
- mpcopy.rz-berlin.mpg.de (MP)
- thcopy.rz-berlin.mpg.de (TH)
- pccopy.rz-berlin.mpg.de (PC)
- elab-ld122.rz-berlin.mpg.de (ELAB)
- vw-druck.rz-berlin.mpg.de (VW)\\