LDAP (Lightweight Directory Access Protocol, is an Internet protocol that email and other programs use to look up information from a server.) in their Address Book please follow the instructions below.
Index (hide)
- 1. Configure the LDAP Address-Book in Thunderbird ( Windows,Linux,Mac )
- 2. Configure the LDAP Address-Book in Apple Contacts / IOS ( OSX 10.13 and above )
- 3. Enable LDAP-Addressbook Autocomplete
- 4. Configure the LDAP Address-Book in Thunderbird ( Windows,Linux,Mac ) - Old Thunderbird Design
- 5. Enable LDAP-Addressbook Autocomplete - Old Thunderbird Design
1. Configure the LDAP Address-Book in Thunderbird ( Windows,Linux,Mac )
IMPORTANT NOTICE: This does not work on the VAP (Virtueller Arbeitsplatz)
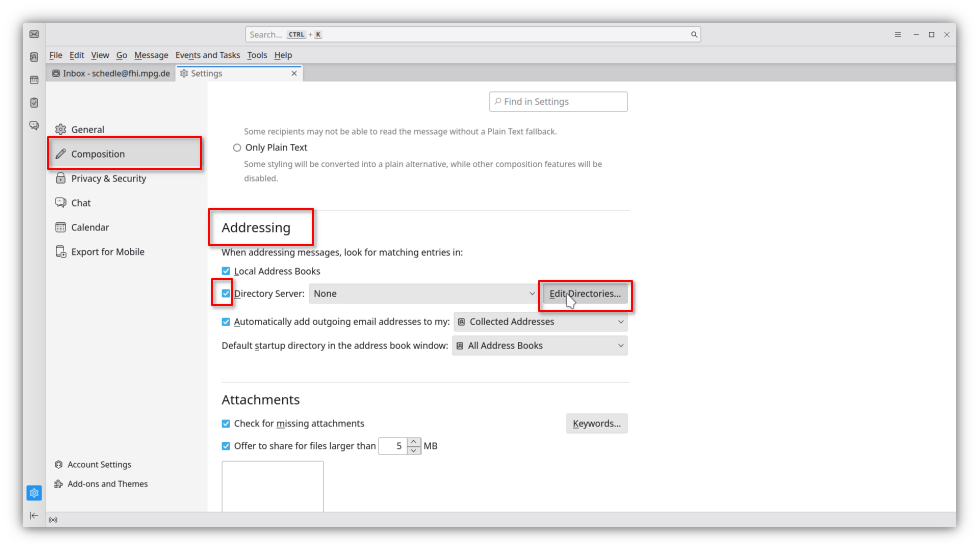
1. Open the Hamburger Menu (three horizontal lines near the closing button) inside Thunderbird and choose Settings / Einstellungen

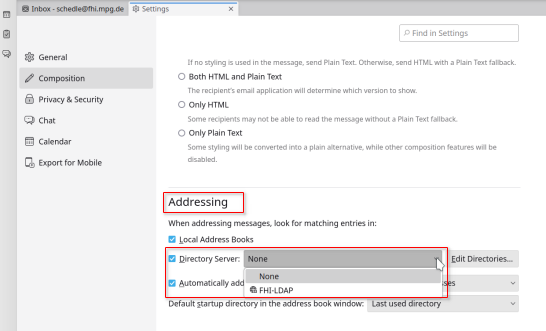
2. Go to Composition / Verfassen and scroll to Adressing / Adressieren Enable the option Directory Server / LDAP-Verzeichnisserver and click Edit Directories... / Bearbeiten
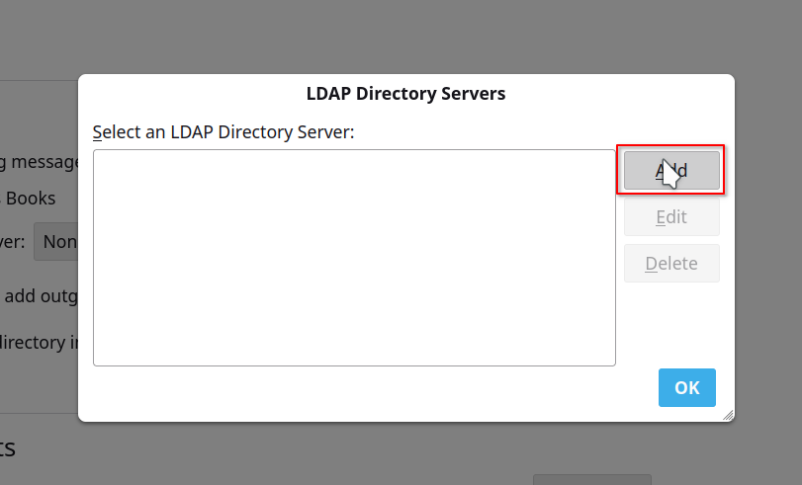
3. Click Add / Hinzufügen to add new LDAP Directory Server
4. The following field will open
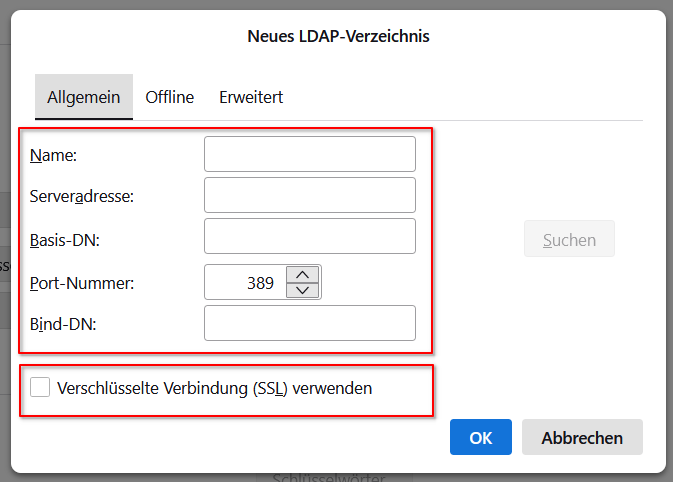
Please fill in the following information:
Name: FHI-LDAP
Hostname: / Serveradresse ldap.rz-berlin.mpg.de
Base DN: / Basis-DN: ou=people,dc=ppb,dc=rz-berlin,dc=mpg,dc=de
Bind DN: uid=yourUsername,ou=people,dc=ppb,dc=rz-berlin,dc=mpg,dc=de
Check Checkbox Use secure connection(SSL) / Verschlüsselte Verbindung (SSL) verwenden
Important!!: replace yourUsername in Bind DN with your fhi username
Click OK to save
5. Click OK to go back to the Settings menu
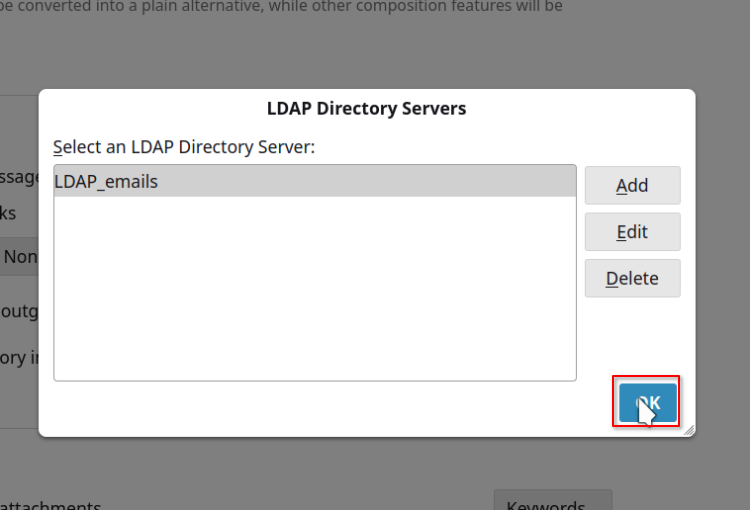
6. Back in Addressing / Addressieren, choose FHI-LDAP as your Directory Server / LDAP-Verzeichnisserver
7. Close and restart Thunderbird
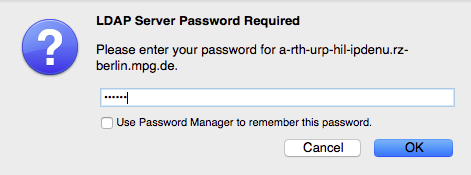
6. When you select 'New Message / Neue Nachricht for the first time, you will be asked for your FHI Password'
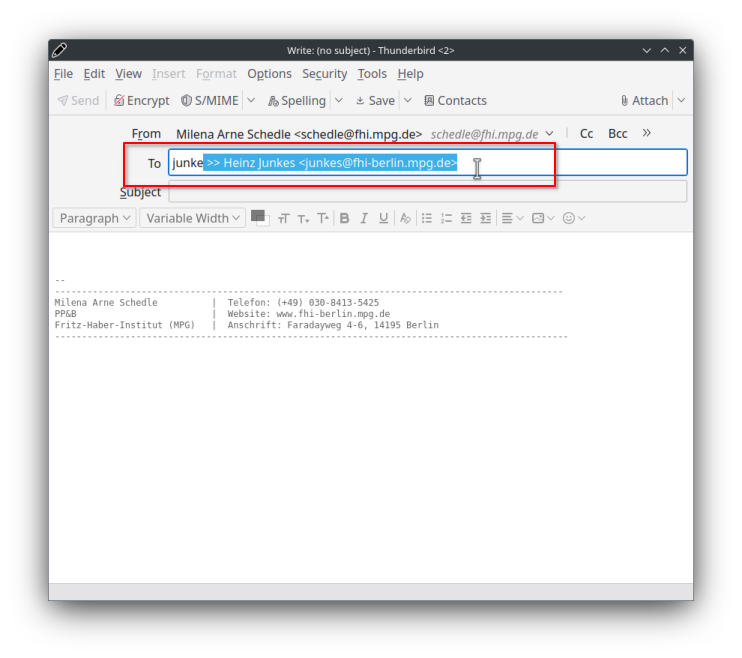
8. From now on, Thunderbird will search for the recipient mail address in your local address-book and the online LDAP FHI Address Book.
9. If it does not work, please proceed with the third Manual on this page, Enable LDAP-Addressbook Autocomplete
2. Configure the LDAP Address-Book in Apple Contacts / IOS ( OSX 10.13 and above )
1. Open "Contacts/Addressbook

2. Go to "Contacts -> Preferences"

3. Click on "+" to add an new account
4. Choose "Other contacts account..."
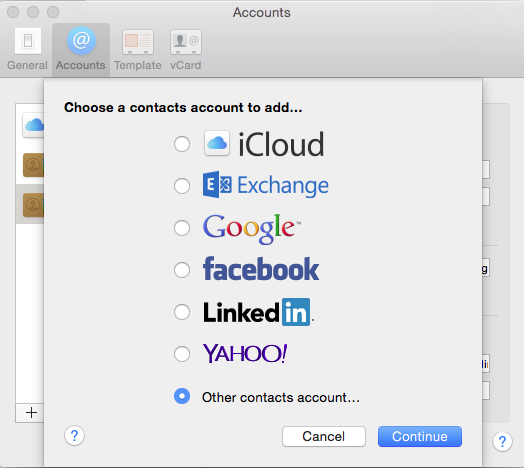
5. Change "CardDAV" to "LDAP"
6. Please fill in the following information:
Example:
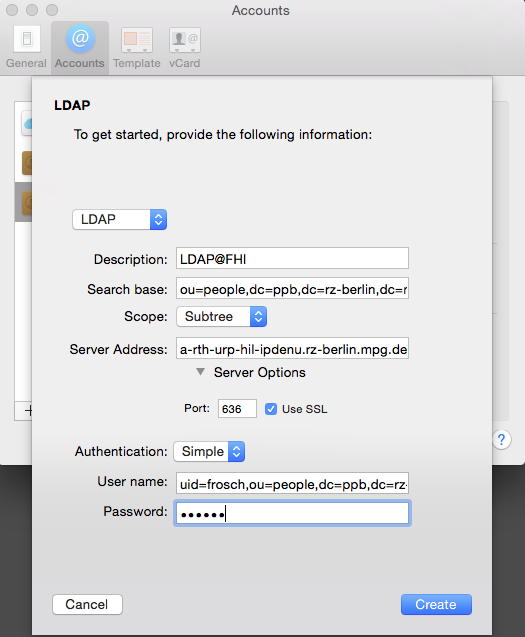
Name: FHI-LDAP
Search Base: ou=people,dc=ppb,dc=rz-berlin,dc=mpg,dc=de
Scope: Subtree
Server Address: ldap.rz-berlin.mpg.de
Port: Auto
Authentication: : Simple
User Name: uid=yourUsername,ou=people,dc=ppb,dc=rz-berlin,dc=mpg,dc=de
Password: your fhi password
- Important: replace yourUsername with your fhi username
Authentication : Simple
7. Click on Create to save
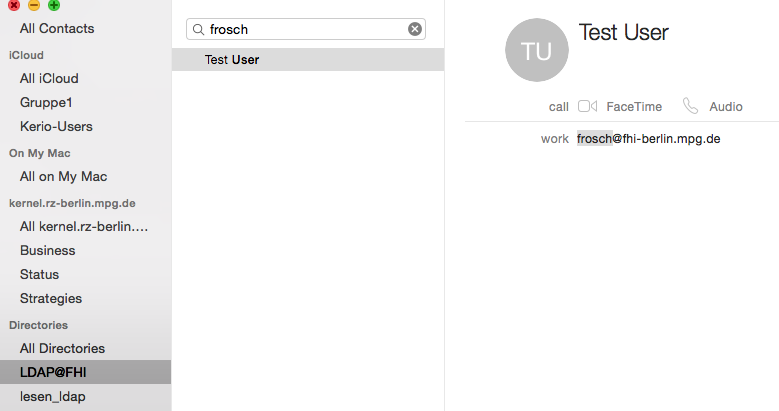
8. You can now search for any username or name of an employee (at the fhi)
3. Enable LDAP-Addressbook Autocomplete
This explains how to fix Thunderbird if the LDAP auto completion is not working properly when composing a message.
IMPORTANT NOTICE: This does not work on the VAP (Virtueller Arbeitsplatz)
Make sure you have finished the "Configure the LDAP Address-Book in Thunderbird ( Windows,Linux,Mac)" manual first up on this page
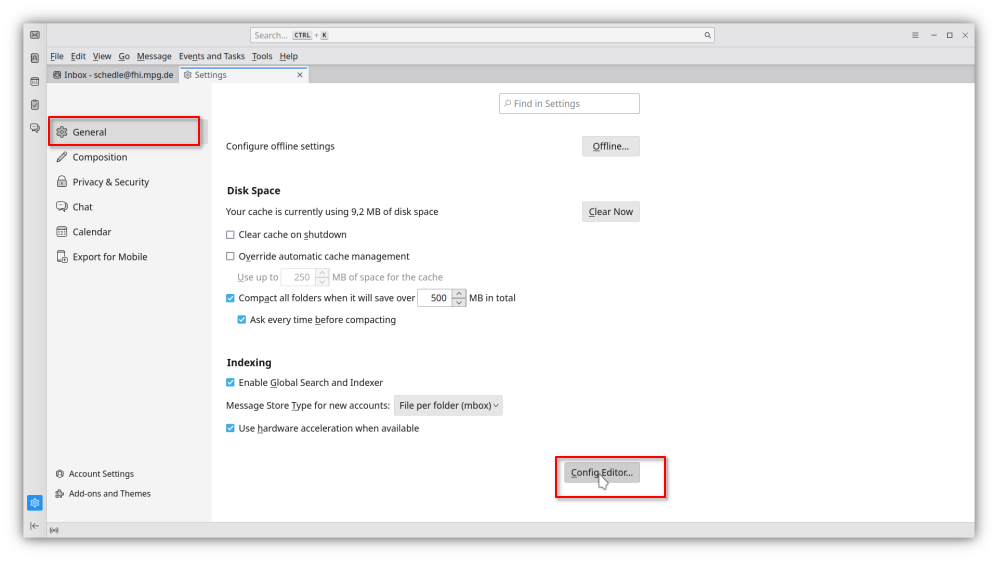
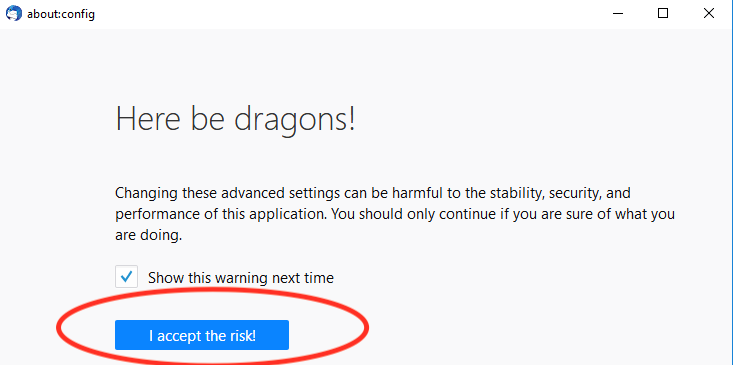
1. Open Thunderbird. Click Edit / Bearbeiten -> Settings / Einstellungen. In the General / Allgemein section, scroll all the way down and click Config Editor... / Konfiguration bearbeiten...
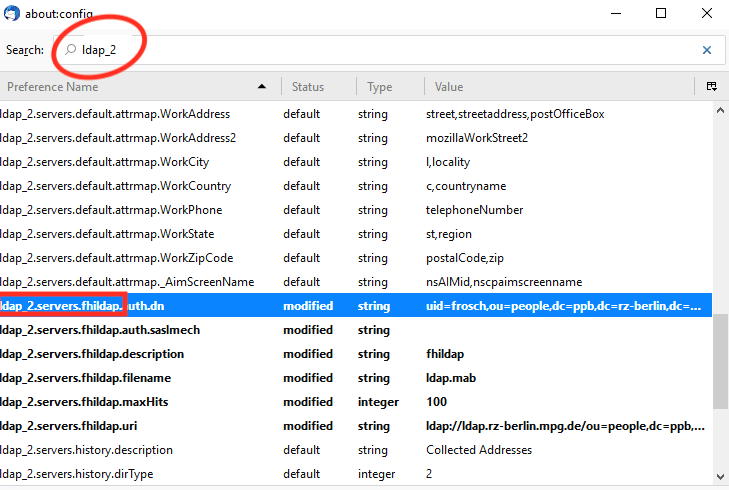
2. A Tab named Advanced Preferences / Erweiterte Einstellungen opens. In the search/filter field type ldap_2
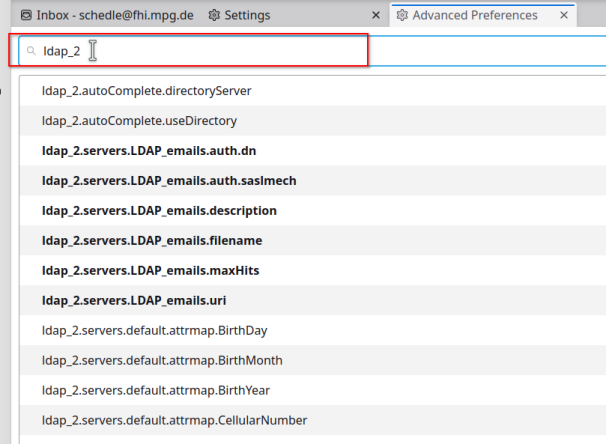
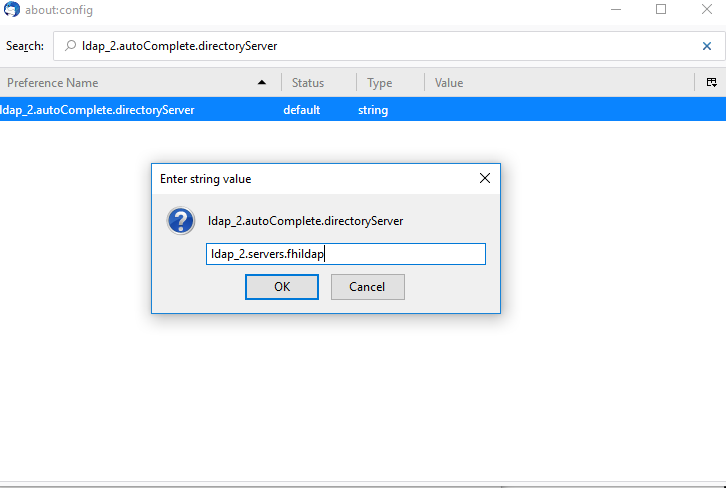
3. Click on the pen symbol of the ldap_2.autoComplete.directoryServer (usually the first up in the list)

4. Copy the name of your created server (here: ldap_2.servers.FHILDAP -> names may vary depending on which name you chose in the first step at the beginning of his page )

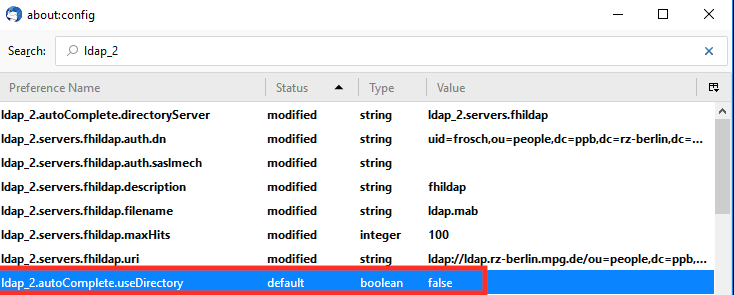
5. Use the toggle button of the ldap_2.autoComplete.useDirectory field (usually the second one in the list) to set it from false to true

6. Exit and restart Thunderbird.
7. From now on, Thunderbird will search for the recipient mail address in your local address-book and the online LDAP FHI Address Book.
4. Configure the LDAP Address-Book in Thunderbird ( Windows,Linux,Mac ) - Old Thunderbird Design
1. Open up the address book inside Thunderbird

2. Go to "New -> LDAP Directory"
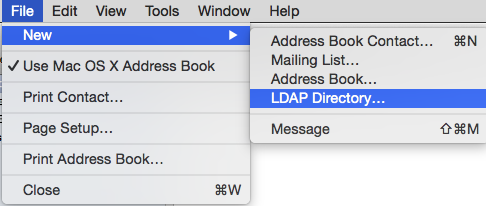
3. Please fill in the following information:
EXAMPLE:
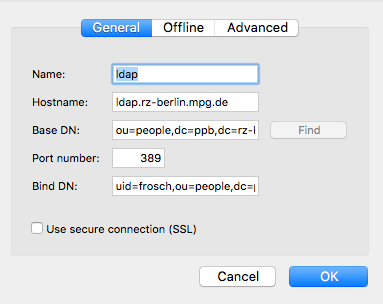
Name: FHI-LDAP
Hostname: ldap.rz-berlin.mpg.de
Base DN: ou=people,dc=ppb,dc=rz-berlin,dc=mpg,dc=de
Port: 389
Bind DN: uid=yourUsername,ou=people,dc=ppb,dc=rz-berlin,dc=mpg,dc=de
- Important: replace yourUsername with your fhi username
4. To save click ok
5. Search for a name in the search filed and insert your fhi password to authenticate.

6. From now on every thunderbird will search for the recipient mail address in your local address-book and the online ldap fhi address-book.
5. Enable LDAP-Addressbook Autocomplete - Old Thunderbird Design
This explains how to fix Thunderbird if the LDAP auto completion is not working properly when composing a message.
Please note: The name will vary depending on what you named the LDAP server during setup (See Configure the LDAP Address-Book in Thunderbird on this page)
First: Enable your Menu bar with a right click

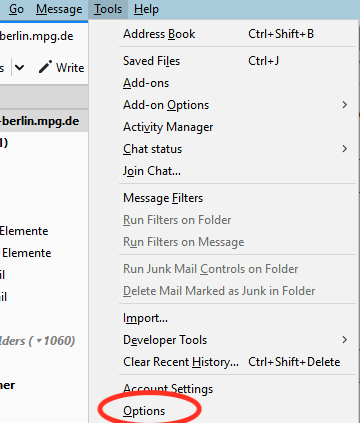
1.Open Thunderbird. Click Tools -> Options (Mac users: Thunderbird -> Preferences).
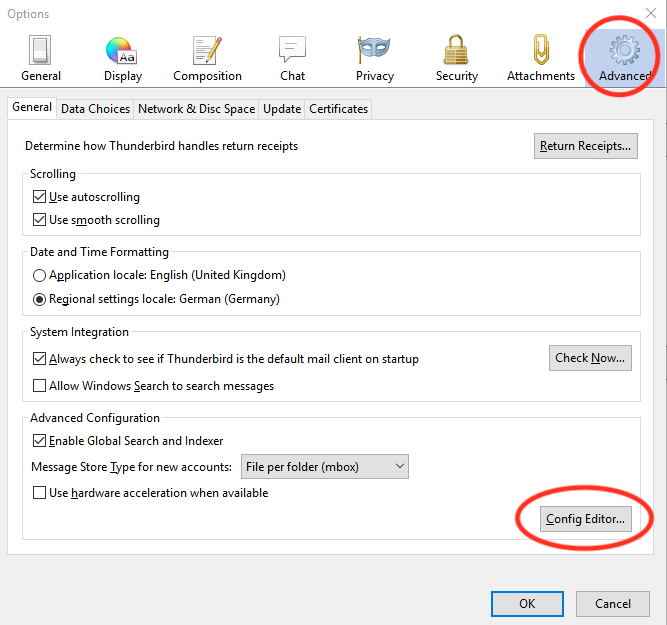
2.Click the Advanced Tab. On the General page click Config Editor.
3.In the Filter field type: ldap_2
4.Find the LDAP server name in the configuration list. This name will vary depending on what you named the LDAP server during setup.
5.In this example the server name is: ldap_2.servers.fhildap
6.Insert the server name in the field "ldap_2.autoComplete.directoryServer" in our case it's "ldap_2.servers.fhildap"
7.Enable also the Preference "ldap_2.autoComplete.useDirectory" with the Value "True" or double click.
8.Exit and restart Thunderbird.
9. Final look at our example configuration
