PP&B Windows Print Server ADPRINT
Please note: You need an valid FHI user account to access the printing system, and it works only work from the internal network.(Not from the DHCP 141.14.151.xx or Wifi-fhi,fhi-guet networks)
Note:Supported Operating Systems:Windows XP ServicePack 3 32Bit
Windows 7 32-Bit and 64-Bit
Apple OSX 10.6.x and newer (via LPD)
Linux Operating Systems (via LPD)
Content (hide)
- 1. Printer Installation for Windows XP Domain Users
- 2. Printer Installation for Windows 7 Domain Users
- 3. Printer Installation for Windows XP/7 Users outside of the FHI Domain "HABER"
- 4. Note for Guests without a fhi account:
- 5. How can i check my printing jobs on the printserver ADPRINT or remove them ?
- 6. Using "Canon Secure Printing" on the Canon Department Printers (Advance 5240)
- 7. Secure Printing - Windows 7/XP Guide
1. Printer Installation for Windows XP Domain Users
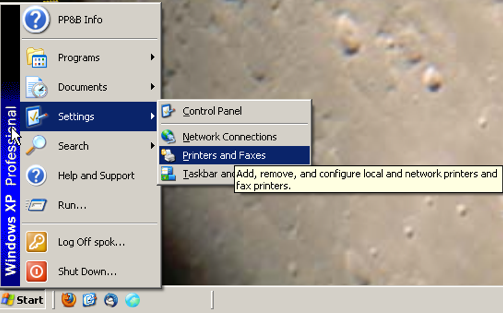 | Choose Start-> Settings -> Printers and Faxes. It opens an Explorer Window. Select the first Item Add Printer and click twice. | ||
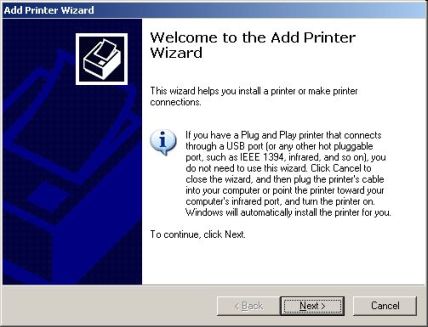 | Add Printer Wizard is opened. Push Next button | ||
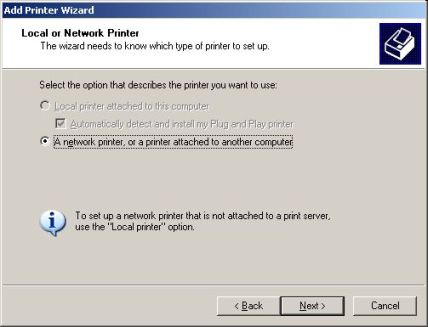 | Here you were ask for the type of the printer- network or local. Choose network printer and click Next. | ||
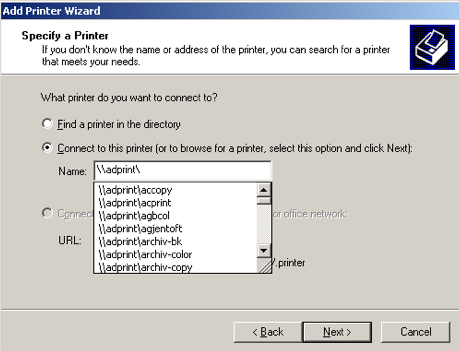 | Choose Connect to this... and type within the textfield \\adprint.rz-berlin.mpg.de\. The typing of \ opens a popup window(see picture) and you can choose one of the printers. To find the right printer for you look also at the printer list page?. After pushing Next button you can not use Back button to choose other selections. | ||
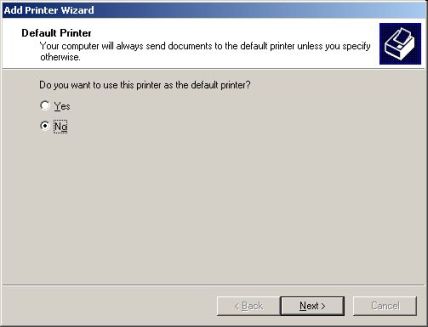 | Select one of the choises and click Next | ||
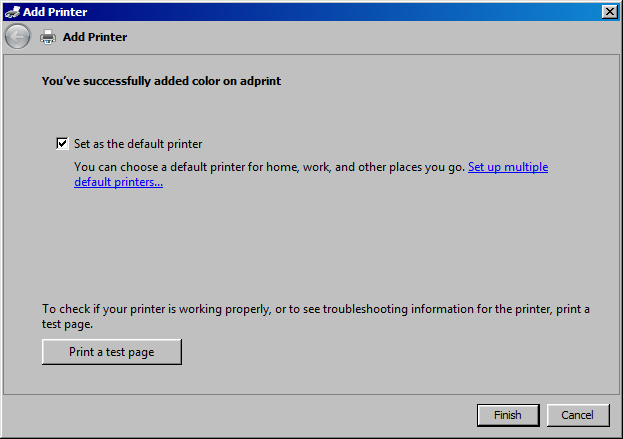
To finish the installation you have to push Finish
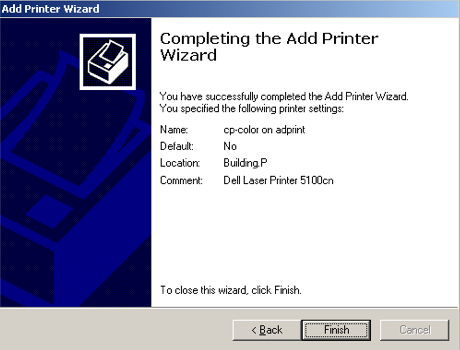 |
IMPORTANT: After installing the printer please check the default settings (rigth mouse button 'Printing Preferences...'). In particular the paper size. In some cases 'Letter' is selected by default. Please change it to 'A4' and push 'Apply' button
2. Printer Installation for Windows 7 Domain Users
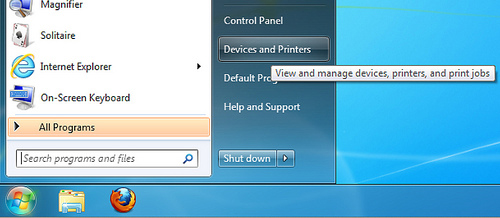 | Choose Start-> Devices and Printers. It opens an Explorer Window. Select the second Item Add a Printer | ||
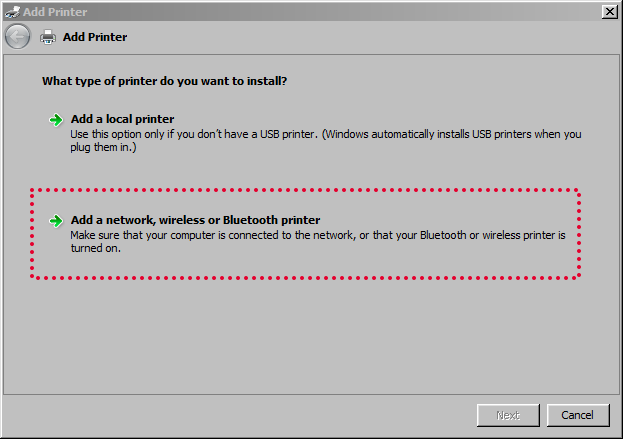 | Add Printer Wizard is opened.Choose "Add a nework, wireless or Bluetooth printer" and push "Next" | ||
 | ''Now choose "The printer that i want isn't listed, and hit "Next". | ||
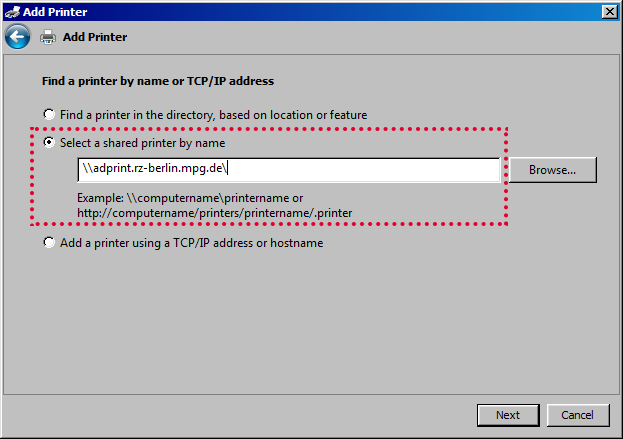 | Choose Select a shared printer by name and type within the textfield \\adprint.rz-berlin.mpg.de\. The typing of \ opens a popup windowand you can choose one of the printers. To find the right printer for you look also at the . After pushing Next button you can not use Back button to choose other selections. | ||
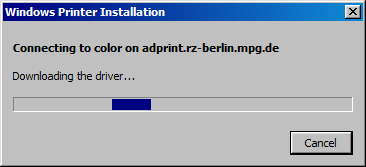 | After few seconds the automatic driver installation (for 64bit and 32 bit Systems) will start, please be patient! | ||
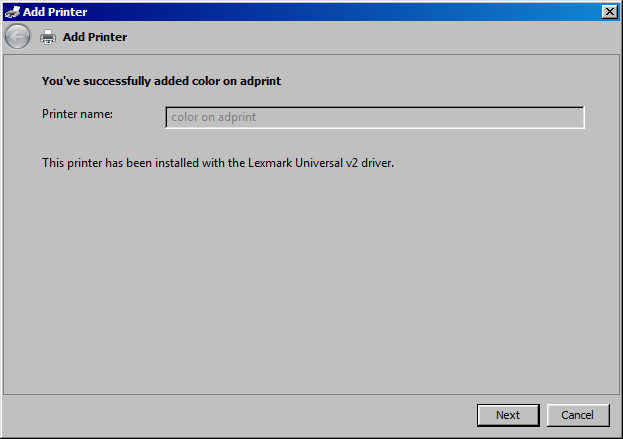 | Click Next | ||
 | Select one of the choises and click Next | ||
IMPORTANT: After installing the printer please check the default settings (rigth mouse button 'Printing Preferences...'). In particular the paper size. In some cases 'Letter' is selected by default. Please change it to 'A4' and push 'Apply' button
3. Printer Installation for Windows XP/7 Users outside of the FHI Domain "HABER"
Some hints for self administrated computers and laptops:
- Check the entry for the DNS suffix and set it to rz-berlin.mpg.de
- Check your name resolution of the DNS server e.g. ping adprint (DNS server IP-address: 141.14.128.1)
- Disable firewalls.
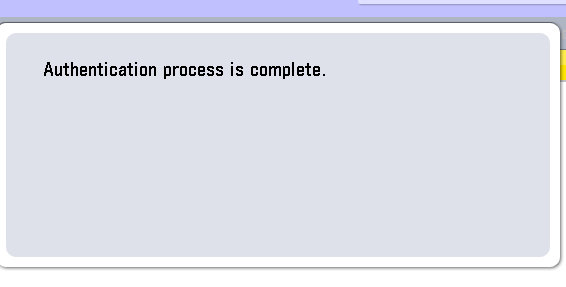
All systems outside of the active directory domain "HABER" must fist authenticate with the print-server "adprint" with their valid fhi username and password. For that you have to map a network drive from the printserver "adprint".
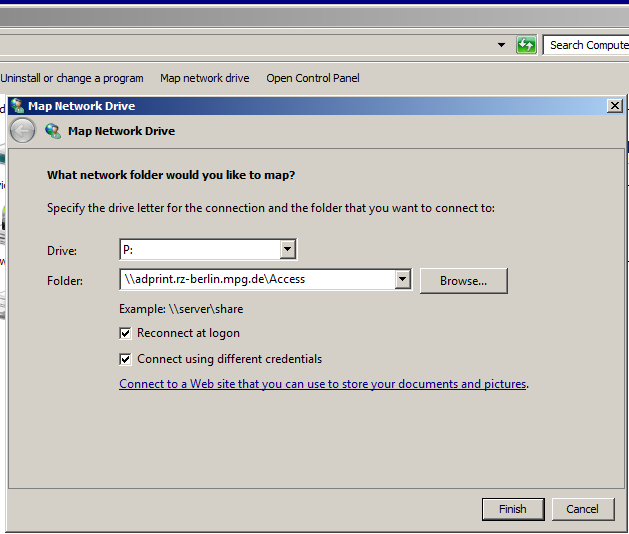 | ''Open the "Computer" window and choose "map a network drive" | ||
| Select a drive letter and insert in the Folder textfield \\adprint.rz-berlin.mpg.de\Access''. Also mark "Reconect at logon: and "Connect using different credentials". Now click "Finish" | ||
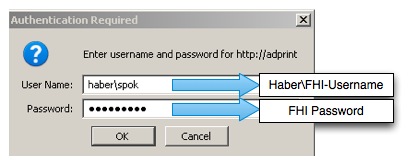
 | ''Insert here your valid FHI Username with the correct domain"haber\username" suffix!Click ok to map the network drive" | ||
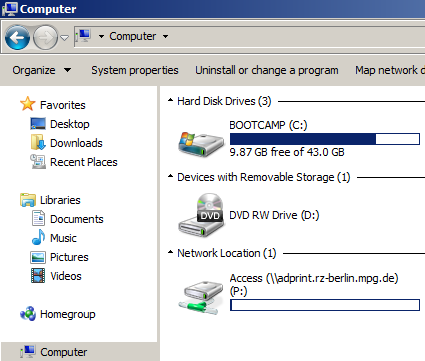 | ''The network-drive "access" from adprint should now be appear in your "Computer" view" | ||
| ''You can now use the normal guides for Windows 7 or XP Systems to install an printer" |
4. Note for Guests without a fhi account:
Please contact the it-responsible person in your department (or secretary) to get an fhi account or (of you have a short stay) you can get an temporary printing account from PP&B.
5. How can i check my printing jobs on the printserver ADPRINT or remove them ?
Plasm have a look at the Printserver Webpage: "http://adprint.rz-berlin.mpg.de/printers/"
 | ''There you must logon with your FHI credentials | ||
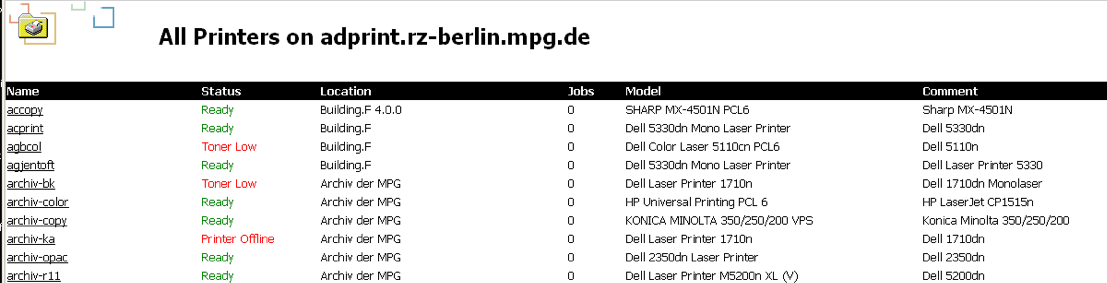 | ''Now you can choose your printer with left mouse click on the printer name | ||
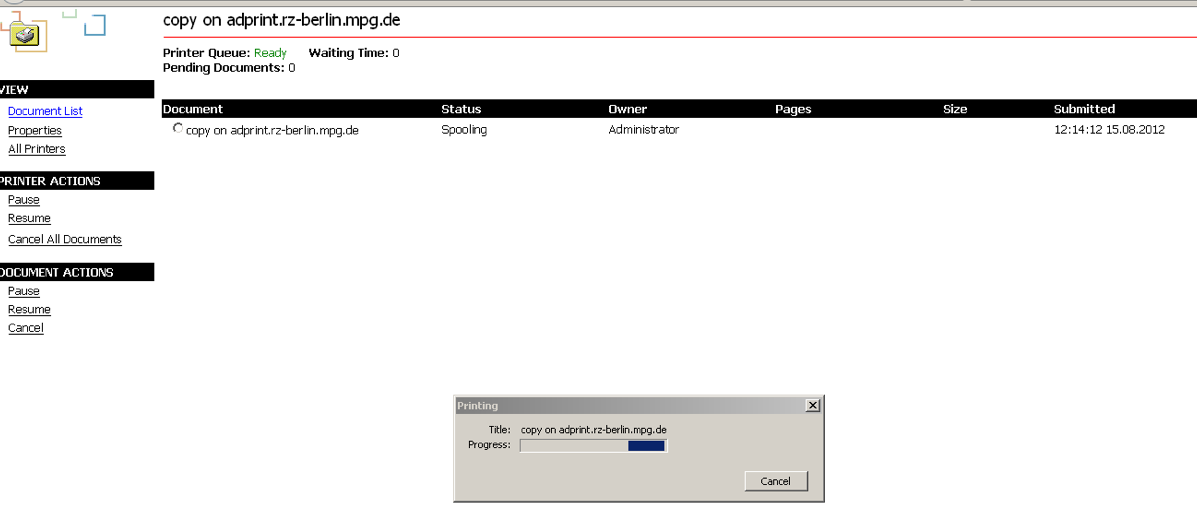 | ''There you can see the printing queue and print jobs | ||
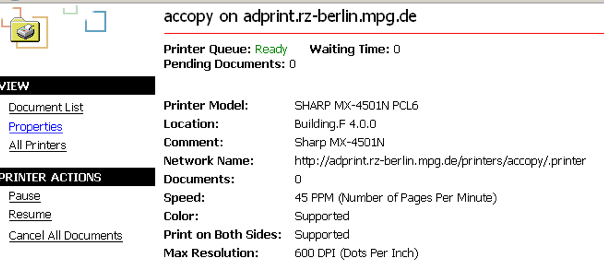 | ''Use View->Properties to see more information about the printer features | ||
6. Using "Canon Secure Printing" on the Canon Department Printers (Advance 5240)
Secured printing saves a print job in the Canon Printer under an assigned PIN (password) and outputs it later only when the correct PIN (password) is entered at the Canon Printer. This function is useful when printing a confidential document.
When you're using the pp&b print server "ADPRINT" you can use this function on any canon advance C5240i department printer.
- This works not when printing on the other pp&b print servers like CUPS or without a valid print driver !
Works on:
- PP&B Workstations
- Self-administrated workstations Windoows 7 or OSX 10.9.x and above (with a valid print driver) (please see the other print guides for installation help)
- Connected via Ethernet (valid IP-Address 141.14.x.x Network or from WIFI EDUROAM) (please see the other print guides for installation help)
7. Secure Printing - Windows 7/XP Guide
1. In your preferred application (word,thunderbird,firefox,... ) click file -> Print
2. Select “Properties” from the “Print” screen.
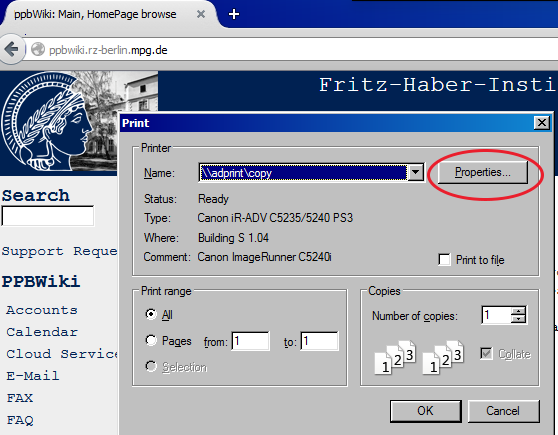
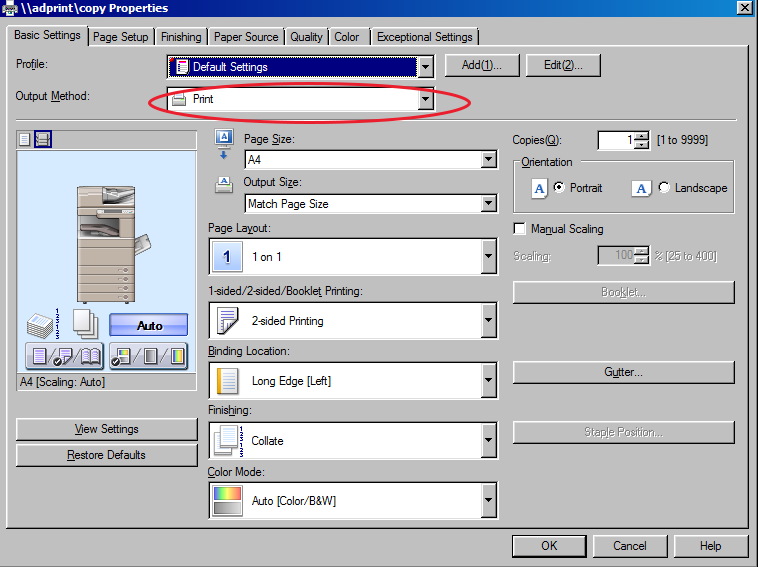
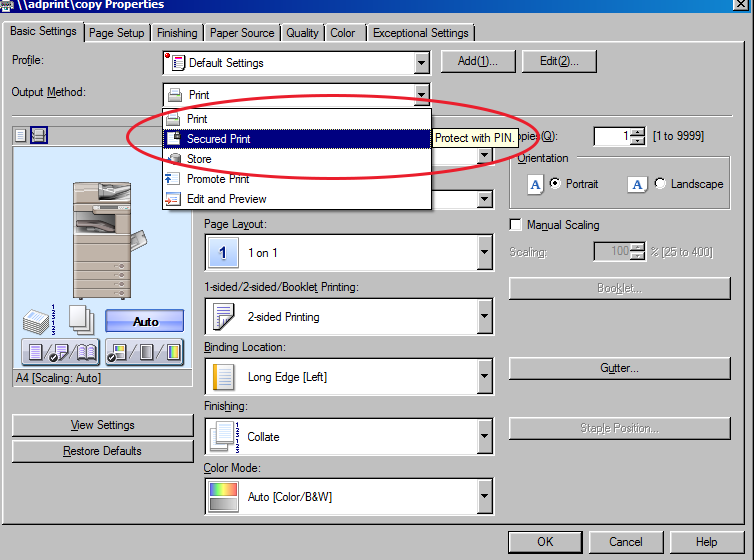
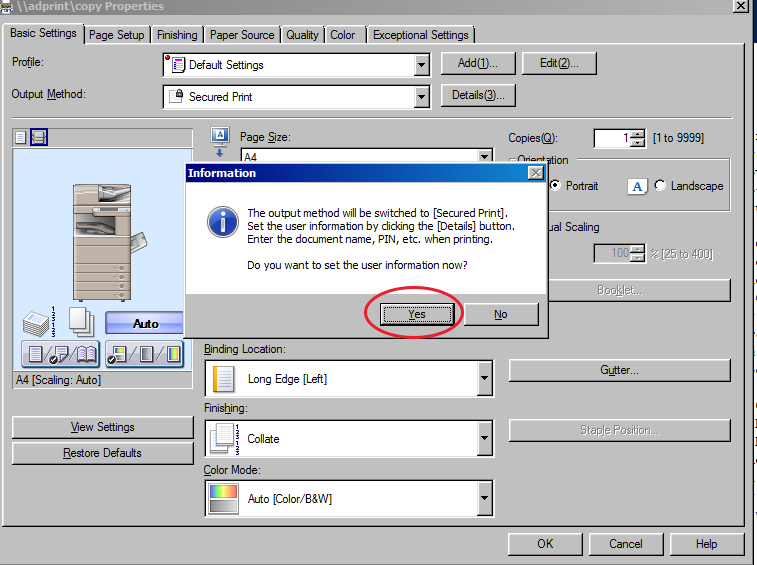
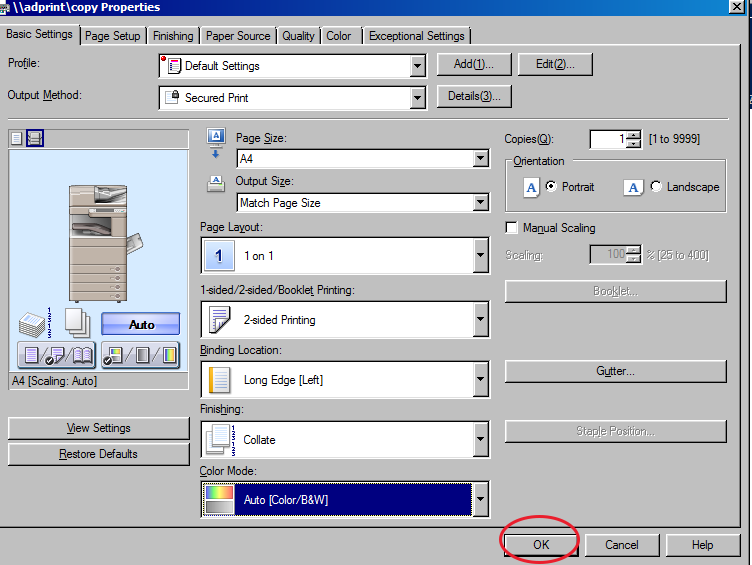
3. Change the "Output Method" from "Print" to "Secured Print"
4. Set the "User information now" by clicking in "YES"
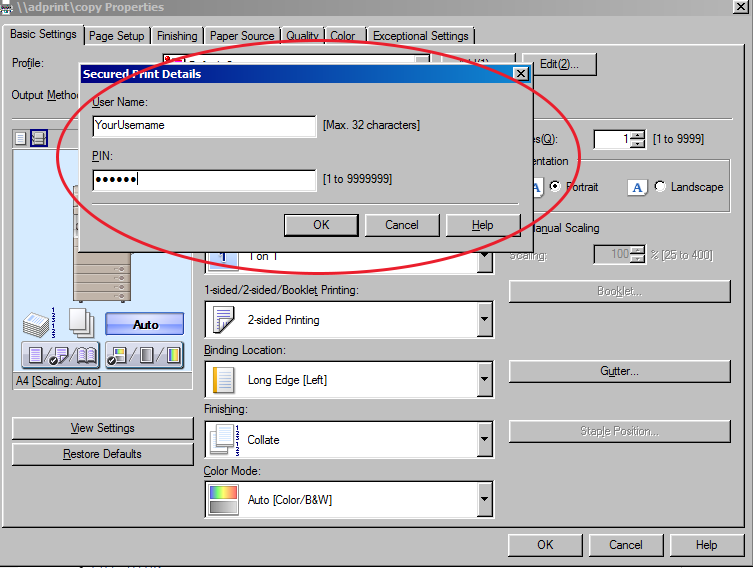
5. Specify the user name and PIN (password) for the current print job in the “Secured Print Details” screen.
6. Click “OK” in the “Secured Print Details” screen to save your changes.
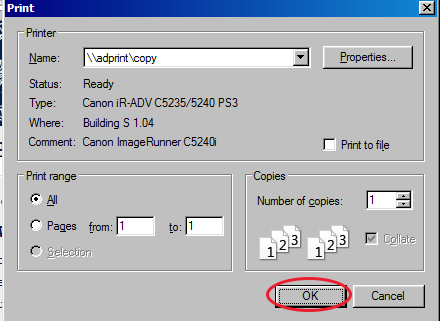
7. Click “OK” to close the “Page Setup” screen.
8. Click “OK” in the “Print” screen. to print your document
9. Confirm Document Name, User Name, and PIN (password) in the “Confirm PIN” screen and click OK. (last time to change the pin for that document)
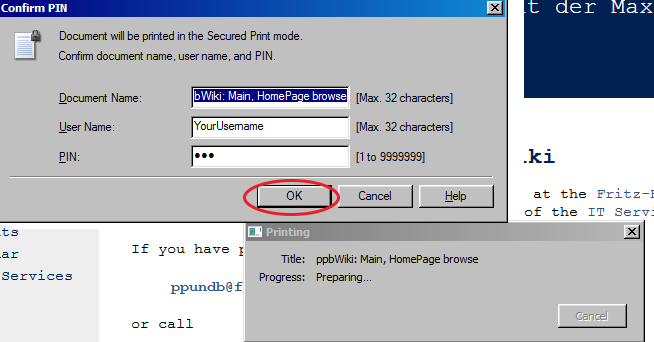
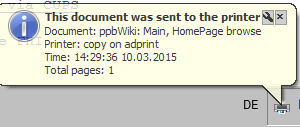
10. The print job is sent and saved in the Canon MFP printer.
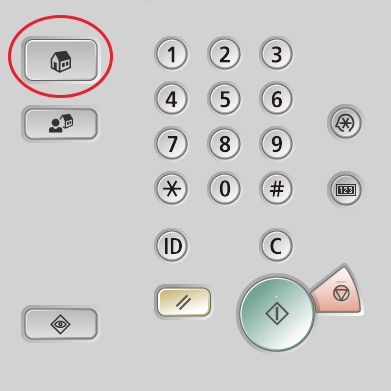
7.1 At the Canon Image Runner Advance Department Printer:
1. On the Canon Image Runner Device control panel, select “Main Menu”.
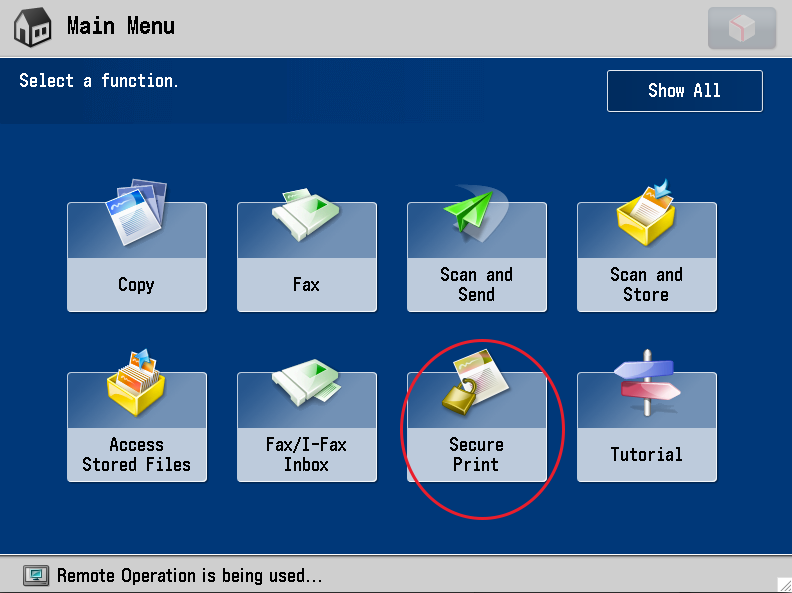
2. On the control panel’s Main Menu, select “Secured Print”.
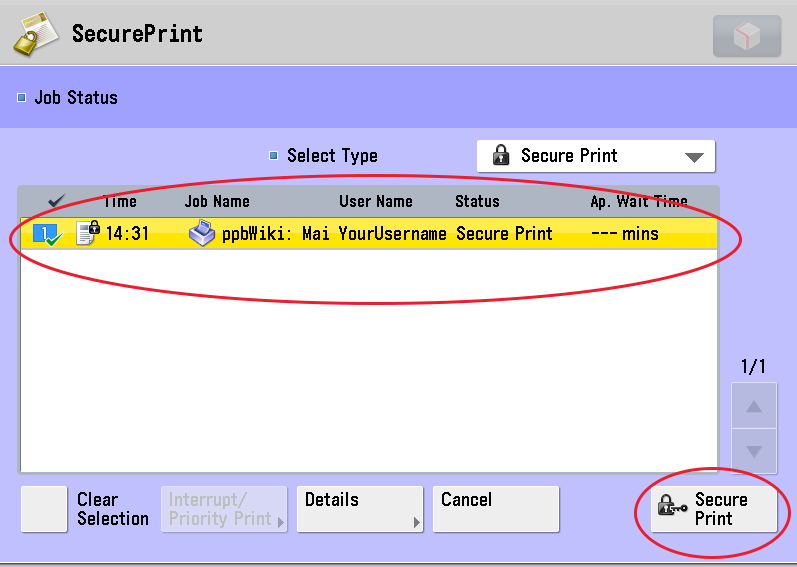
3. Select the print job you want to print, then select “Secured Print” on the lower right of the screen to start the selected print job.
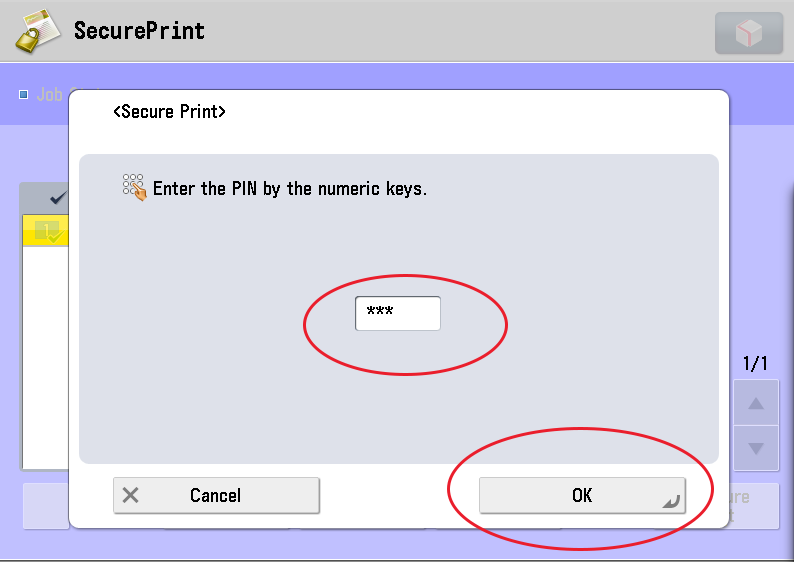
5. Enter the PIN or password that you originally assigned to the document at the computer using the numeric keys on the Canon MFP.
7. The print job is output only when the correct PIN (password) is entered.